When doing makeup for a special occasion, there is a common fear of looking “not like yourself” or “overdone.” I hear this frequently, and it is usually (and unfortunately) followed by displeasure after viewing the resulting photographs. There was no special element, no magic, nothing different from a normal day. The tones are washed out and missing warmth. Here are a few makeup tips to help deliver you amazing captures while putting your mind at ease.
The best advice I can give – wear your favorite makeup, plus. Usually wear a cat-eye liner? Pop some shimmer on the eyelid or apply a strip lash to add more dimension and open the eye. Not a makeup wearer? A bit of color on the cheeks and lips, plus something dark to define the eyes (liner or mascara) will enhance the beauty you already love flaunting every day. No need to try a smoky eye for the first time, or an unusual lip color – now is the time to feel yourself, but you at your very best.
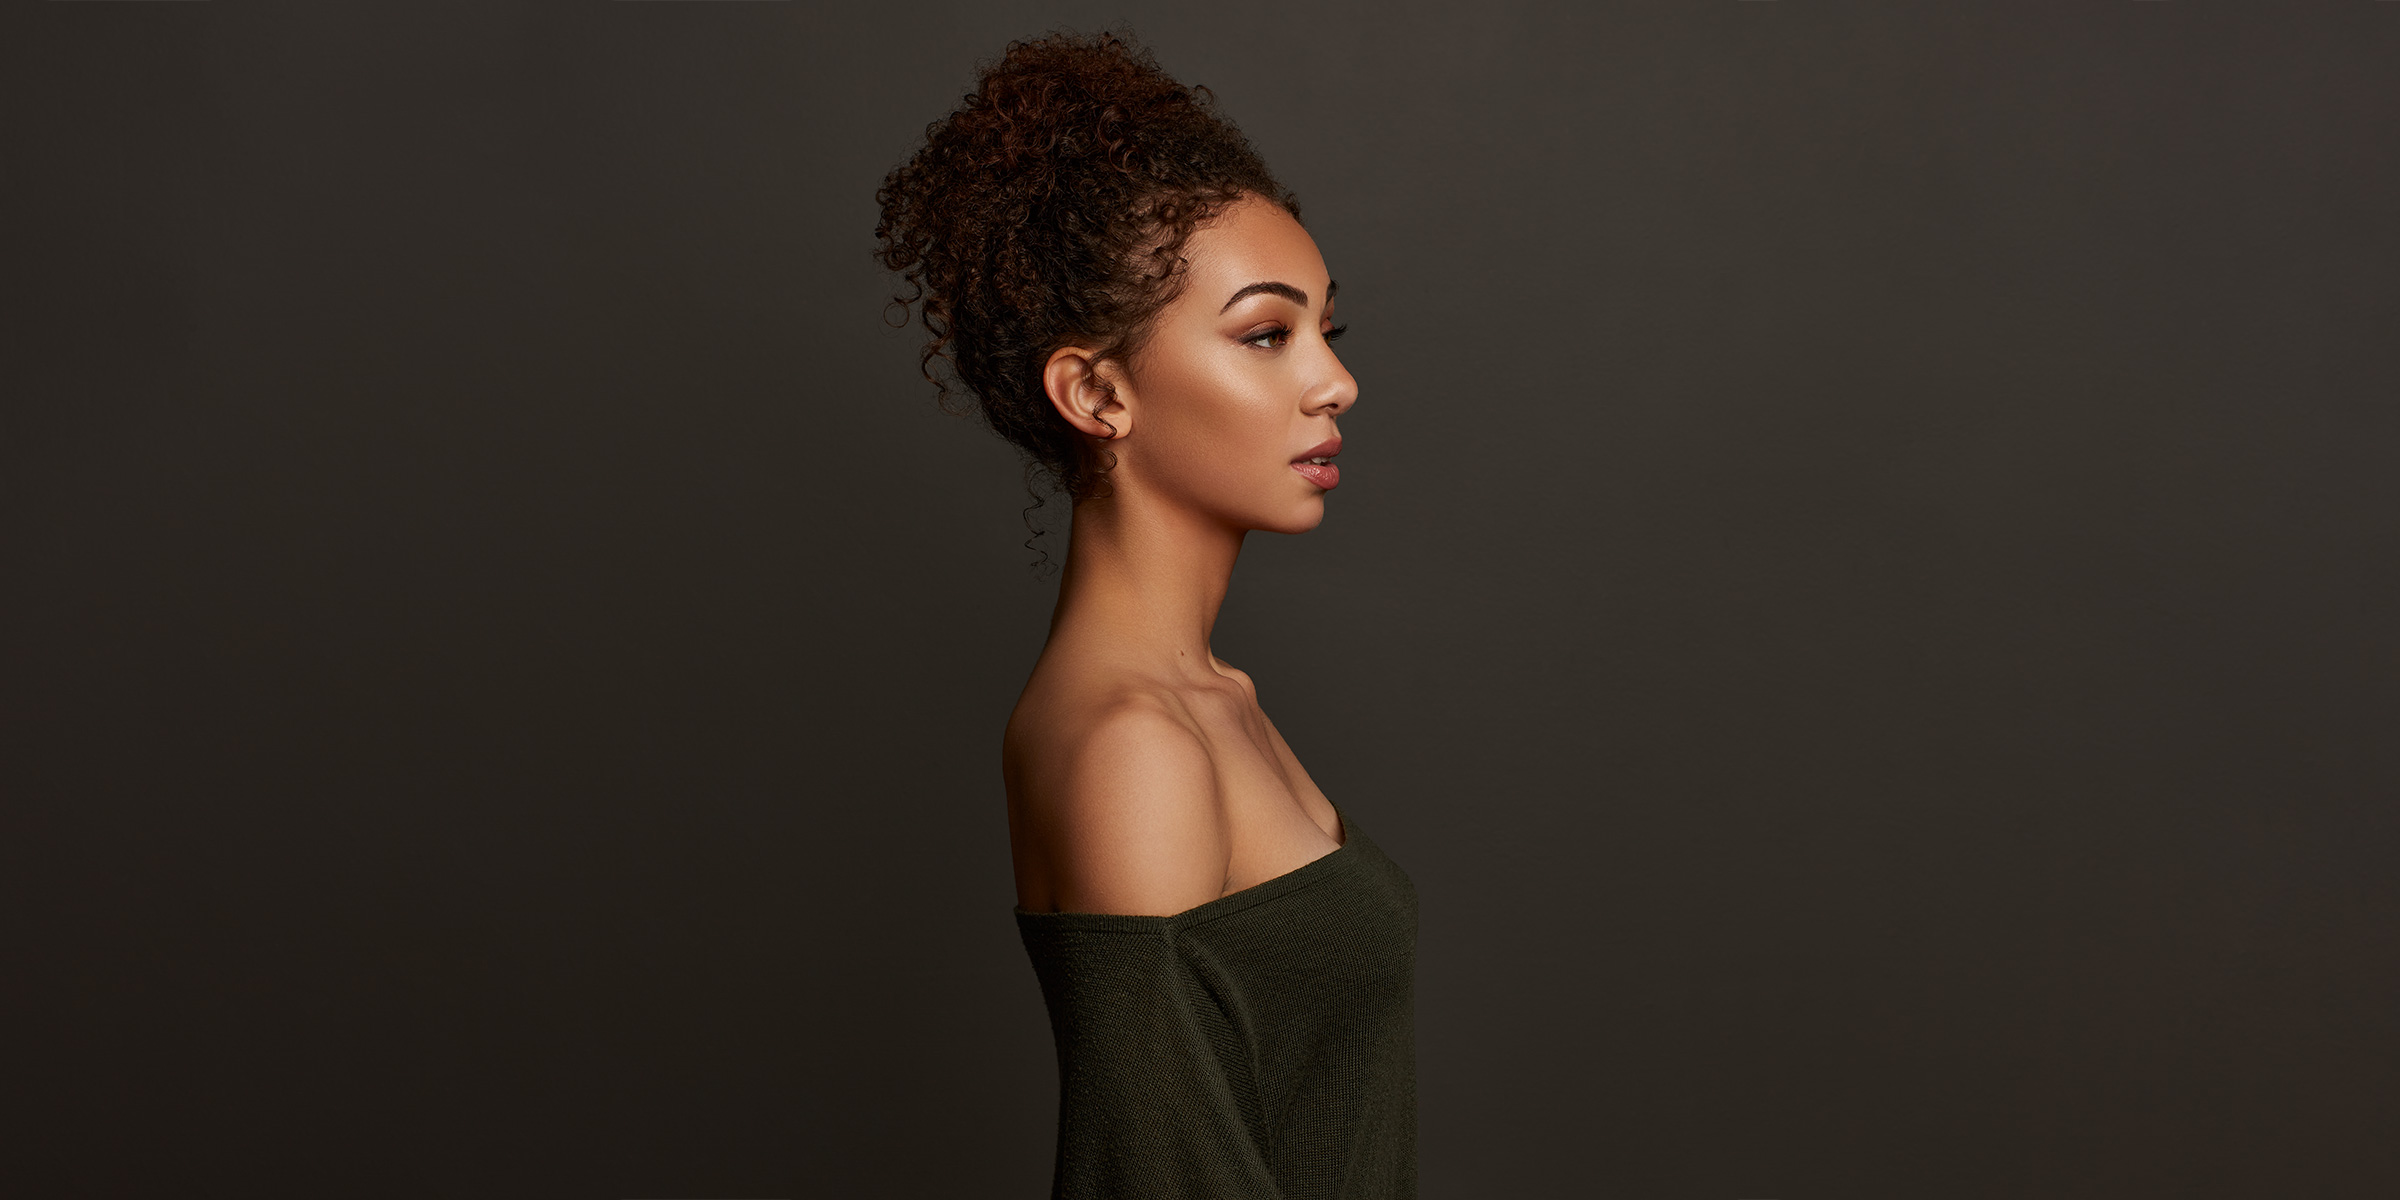
What To Know About Photoshoot Makeup
The camera never captures makeup and color in quite as much vibrancy as is visible in real life. Light bouncing off of makeup changes the way it looks, and makes it look less dramatic than it really is. Images are two-dimensional, so shadows and highlighted areas may need to be emphasized, de-emphasized or even simulated, for the best overall effect. A bit more product than usual or darker tones on the eyes and lips will ensure that your favorite features are visible and enhanced properly for film.
Still anxious about finding the right balance? You can always hire a professional to pamper before the shoot and provide the perfect look tailored to you. This can also be an excellent time to trial the look you’d like to wear on your wedding day. Ready and inspired but not sure where to start? Let me break down a few best practices below for you to peruse:
Makeup Tips for Skin
Photography, outdoor or indoor, requires lots of light which can wash out your complexion. Regardless of base products, which can be whatever coverage you wish, you will want to apply more warmth and tone to your skin than usual. Bronzer and blush products swept across the forehead, swirled onto the apples of your cheeks, and brushed lightly onto the eyelids, chin, and nose, will warm up your natural tone and impart the proper look of infatuation one should portray in engagement photos – or perhaps just family shots. Avoid products with built-in sunscreen — it doesn’t work well with flash photography and can give the face a white-cast, mask-like appearance.
A light powder on the nose, forehead, the folds by the mouth, and lightly under the eyes will help to hold things in place and keep the sheen of the skin in the right places – the cheek bones, the brow bones, and the cupids bow. The right amount of ‘shine’ looks like real skin and the effect will go far in your photos.
Makeup Tips for Eyes
You are going to be gazing at your lover (or child, or dog, up to you) for an average of 2 hours, so you’ll really want to make your eyes sparkle (figuratively or literally). Deepening the lash line is an absolute must-do for photo shoots. Though I’d generally recommend wearing a strip or individual lashes to enhance the eyes, not everyone wants to spend time placing adhesive dangerously close to their cornea. I get it.
Black eye pencil on the upper tight-line/waterline can make anyone’s eyes pop without risking vision. Gently lift the upper lashes and apply a waterproof liner to the small, pink edge of your upper eyelids – from the outer corner nearly to the inner corner, but not quite. If you’d still like a bit more oomph, take the same liner and draw on your upper lash line from outer corner to middle of the eye. Then, take your pinky or a small brush and gently soften and blend. This will open the eyes and add more definition – softly. You, plus!
Makeup Tips for Brows
Groom. Groom. Groom. If you’ve never touched your brows, a clear brow gel will get all the hairs going the same direction and hold them in place. If you usually fill or shape, adding a matching, tinted brow gel on top of your usual application will add definition without darkening the color. Make this your finishing touch!
Makeup Tips for Lips
Much like the complexion, lighting can remove some natural tone found in the lips. Unless you are a lipstick wearer normally, you will want to add more tone and definition than a normal day. Filling in your lips with a liner one shade darker/bolder than your natural color and applying a moisturizing chapstick or balm on top will help to plump and define. Lips also have a tendency to look dry or dehydrated in photos, so feel free to apply hydration liberally, or even go for a smooth gloss. Kissable, am I right?
Finishing Touches
First thing’s first: blend, blend, blend. This is extremely important in photography, as flash and lights bounce off of makeup and will reveal every patch. Once everything feels just right, use a setting spray to ensure the makeup stays intact – Urban Decay All-Nighter setting spray is my favorite and worth every penny. Of course, that doesn’t mean you won’t have to touch up during the shoot — makeup melts exceptionally fast under lights or in humid environments, so be sure to keep powder and lip color on hand.
Get Excited!
Don’t sweat the details. You know yourself better than anyone – if it feels right, it is right! At the very least, have some of the products discussed above on hand and the photographer can guide you into touch ups after you are in the right lighting. Ultimately, you are making memories with the ones you love most – looking your best is icing on the cake! A genuine smile and a connected gaze will be your true tickets to success.